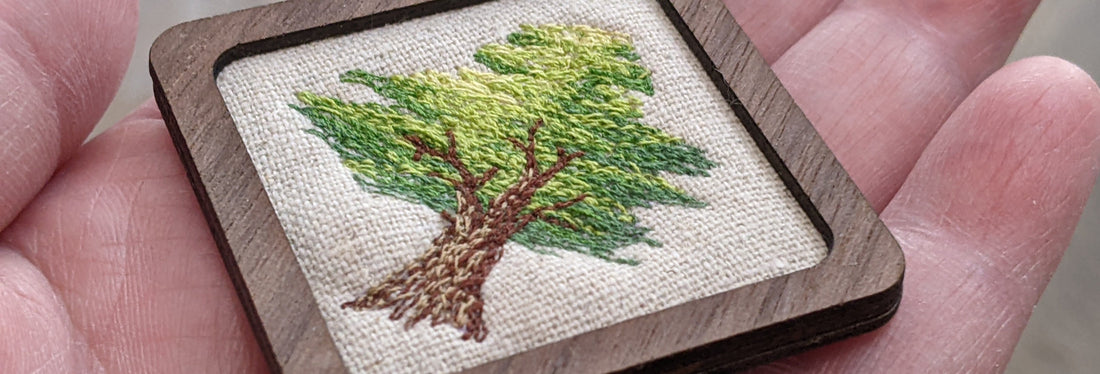
Mini Tree Thread Painting
Share
Well, welcome to my blog, I guess. I must admit, it kind of feels a little like 1999 to be writing a blog, but I'm told blogs aren't dead just yet, so let's give it a crack!
One of the things I aim to do with this blog is to share some fun techniques that I've used (or have been meaning to use) to create my jewellery. They're ones that I don't see myself making into patterns but are fun to play with nonetheless.
While I'll be finishing them using my jewellery frames (and for obvious reasons I'd love you too as well!), you can also use the techniques to create pieces for pincushions, bag pockets, or enlarge them and use them as quilt blocks or cushions. Anything you can think of really.
This month, I'm focusing on quilting/ thread painting ideas. My first project is a tree. I've been kind of obsessed with trees, ever since I first started quilting, it's probably one of my favourite motifs, even if I'm rarely happy with the results! (although this one I actually really liked)
I've filmed my process for this, but I have to apologise. I was so excited to get going that I forgot to take any photos along the way (and my hand took up the entire shot while I stitched the trunk, so I haven't included that bit!)
Alright, let's jump in.
So, I begin by layering a piece of thin cotton wadding with a layer of cotton fabric and mounting in a embroidery hoop. I like to use some wadding because I'm a quilter, and it helps with tension, but to mount it in the frame I don't want it too thick. Using the embroidery hoop will prevent distortion while you're stitching.
I've used 4 colours for the leaves, and two on the trunk. You want to make sure you go from a very dark to very light colour. I like to start with the darkest and move to the lightest. You can see in the video that I've drawn on a very rough outline for the shape of my tree.
For this tree I've chosen to stitch in a mostly horizontal direction for the leaves. Honestly, at this scale you probably won't really see it, but I'm envisaging a tree with quite horizontal levels of foliage (if that makes sense). On a bigger piece I'd probably go for a much rougher circular motion.

As I move through my thread colours I stitch a little over the previous colour to blend it. I think a little about a light source in the top left side, keeping the darker colours on the bottom right. I've added some darker sections in to define different areas of foliage to it doesn't look like one big blob.
As I said, I haven't really filmed much of the trunk, but it's a matter of stitching in the main area in the darker colour and then adding a few diverging branches through the foliage. I've then added a few highlights to the left side of the trunk.
I did consider adding a background to this piece using watercolour pencils, but decided I liked the way it was.
I then framed the piece using a diamond shape that I'm releasing shortly. This will be a pendant (and thus saves me from having to try and make a second one the same as for earrings!).

Hope you've enjoyed this. Would love to hear your comments and feedback on this project and any others you'd like me to share with you. If you give this a try, please let me know!

3 comments
I was in your Bubble Puffs class in 2022. My Bernina Q20 broke down and that was the beginning of a long story of machine issues. Unfortunately, I was distracted and never finished the class. I came looking for your gallery of exquisite work to share with the Handi Quilter stationary/sit-down quilters on Facebook. I miss your gallery but was pleasantly surprised to find this blog entry and some tips on how to thread paint and see that you are now doing your finely detailed work on a stationary machine rather than a longarm. Thanks for this mini-lesson!
Thanks so much Greensy for the suggestions- stay tuned, will definitely be some more hoop projects shortly! And I’ll definitely be sure to include sewing machine settings :)
Great first post! It would be nice to see what else you made in the hoop and what settings you use on your particular sewing machine, just some ideas for future posts ;)