Bubble Puffs Necklace
Ok, so it's been slightly longer than intended since I last posted, but what can I say? I'm a goldfish, and there's lot's of shiny things in life!
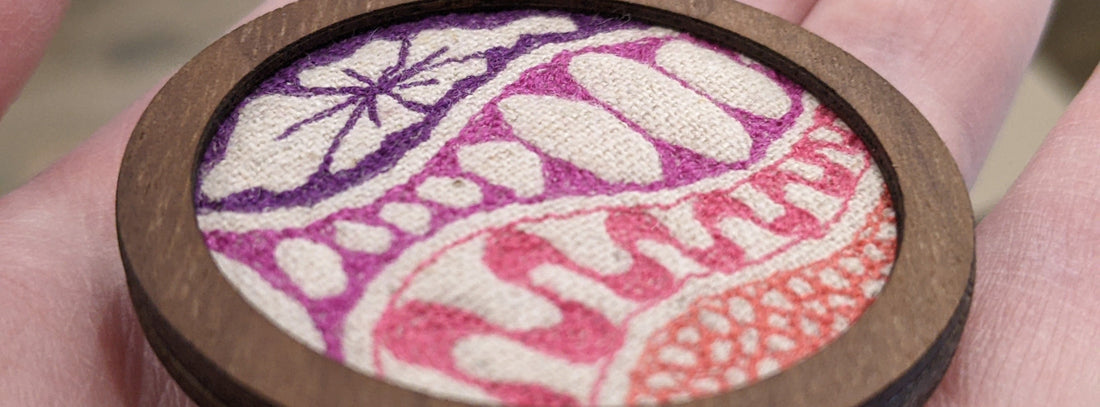
Anyway, new day, new tutorial. Today I'm going to share with you a funky necklace design based on my (slightly) famous bubble puffs design. If it appeals, you can check out my full quilted trapunto class here.

This design can be varied in so many ways, play around with thread colors, change background fabrics, I've even, in the past, painted the circle with a gradation using paints or watercolor pencils.
As with the previous tutorial, I start off layering some fabric and thin wadding into a embroidery hoop, as I'm going to stitch this on my domestic machine. I mark out the circle size using the wooden frame as my template and mark a few wavy lines to use as a guide for the design.
I've added a little extra space around my circle, because the dense stitching can cause the fabric to shrink up, and there's nothing worse then finishing a design and finding it's too small for the frame. Because it's so small, there wasn't much shrinkage, but better safe then sorry!

With each layer of stitching, stitch the boundary lines for that section first, then fill with whatever free motion quilting you choose. Watch the video for a couple of my favourites.
Once finished stitching, cut out the design and finish either in a mini makes frame or in whatever other way you choose.
Thanks for joining me with this project today, I hope you've enjoyed. I'd love to hear any feedback you have, or see pics if you make your own version of this!
You can watch my process in the video below: